
A HOMEOWNER’S GUIDE · TRACY & NEARBY COMMUNITIES
The complete guide to
interior house painting.
From a bedroom or living room to the whole interior, plan a repaint that fits your home. Explore colors, finishes, preparation, costs and timing for Tracy and nearby cities in Central Valley and East Bay.

BEFORE WE BEGIN
A good starting point.
One decision at a time.
You do not need to decide everything at once. Start with the room’s condition and how you want it to feel, then work through colors, finishes and timing at your own pace—whether you are refreshing a bedroom, coordinating an open-plan living area or repainting before moving into a home in Tracy or a nearby community.
YOU DO NOT HAVE TO READ EVERYTHING
What would help you most today?
Choose a starting point. You can explore the rest whenever you are ready.
BUDGET
What affects the price?
Scope, repairs and estimates →
THE LOOK
How do I choose colors?
Light, samples and existing finishes →
MY HOME
How do I plan around daily life?
Room access and connected spaces →
In this guide — choose a section
01 / ROOMS & SURFACES
How do you plan an interior repaint, from one room to the whole house?
Start with the change you want: a brighter room, a more cohesive palette or a finish that is easier to care for. Whether you are refreshing a bedroom, repainting the living room or updating the whole interior, identify which spaces and surfaces are involved. Walls, ceilings, doors and trim can each need different preparation and products.
Walk through the space and notice scuffs, cracks, stains and existing finishes. You do not have to diagnose them yourself; record what concerns you so it can be assessed before the work is planned.
With CR Painting, you first get in touch and coordinate a time that works for you and our team. This conversation then takes place during a free on-site visit. We look at the rooms with you, listen to what you would like changed and prepare the estimate after understanding the space and your priorities.
DEFINE THE SAME PROJECT BEFORE COMPARING PRICES
Which surfaces are included in your repaint?
Walls
Identify the rooms and connected wall areas included in the repaint.
Ceilings
Confirm whether overhead surfaces, stains and texture repairs are included.
Doors & trim
List doors, frames and baseboards separately; cabinets need their own coating scope.
Use this surface guide for one room, several spaces or the whole interior. A walls-only refresh and a repaint including ceilings, doors and trim are different scopes. Identify the surfaces together; you do not need to measure them before requesting a visit. Cabinets and built-ins need their own finish scope.
02 / COSTS & ESTIMATES
How much does interior house painting cost in Tracy and nearby areas?
There is no single reliable price for every interior repaint. The cost depends on paintable surface area, repairs, access, included surfaces, color changes and the selected coating system. A home’s floor square footage alone is not enough to establish a reliable price.
| Cost driver | Why it changes the work | Ask this question |
|---|---|---|
| Surface condition | Patching, texture blending and failed coatings add preparation. | Which repairs are included, and which are separate? |
| Walls vs. full interior | Ceilings, doors and trim require additional work. | Can you list each included surface by room? |
| Height and access | Stairwells and high ceilings need an access plan. | Does the quote include the tall entry and stairwell? |
| Paint system | Primer, product line, sheen and coverage requirements vary. | Which products and application steps are specified? |
| Occupied rooms | Protection, moving and phased access affect labor. | Who moves furniture and resets the rooms? |
What makes two estimates different?
A walkthrough provides a more useful budget than a generic floor-square-foot rate. If you want to adjust the scope, discuss your priorities and have agreed changes reflected in the proposal.
For a single room, clarify whether the price covers walls alone or also the ceiling, door and trim. For a living area connected to a kitchen or hallway, define the stopping points. For a whole-house interior, list the included spaces, surfaces and repairs so both the total and any phased options are clear.
03 / TIMELINE & ROOM USE
How long does interior house painting take?
The timeline depends on the rooms and surfaces included, repairs, access and the selected coating system. Ask for a project-specific work sequence after the home has been assessed, including drying between steps and when each room can return to use.
A single bedroom may involve one contained work area. A living room connected to a hallway needs clear boundaries and usable routes. A whole-house interior needs an agreed sequence across rooms, ceilings, doors and trim, especially while you are living at home. Repairs and additional coats may need waiting time even when no one is actively painting.
BEFORE
Confirm the scope
Agree on surfaces, products, colors and furniture responsibilities.
DURING
Plan usable spaces
Coordinate bedrooms, home-office hours, pets and access through the house.
AFTER
Follow aftercare
Confirm product guidance for room use, furniture and cleaning.
When can you use or sleep in a freshly painted room?
There is no universal waiting period that applies to every product and household. Follow the selected coating’s ventilation and return-to-use instructions, and discuss sleeping arrangements before work starts. Low odor alone does not establish that a room is ready for occupancy.
Does dry paint mean the room is ready for everything?
No. Dry to the touch, ready for another coat and fully cured are different stages. Ask when to move furniture against walls, clean the finish or expose a bathroom to shower steam. Use the actual product instructions rather than a generic number of hours.
04 / PLANNING AROUND YOUR HOME
What changes when painting one room, a living area or the whole interior?
The same planning basics apply at every scale: define the surfaces, check their condition and agree on access. What changes is how the work connects to the rest of your home. These examples apply to homes in Tracy and nearby Central Valley and East Bay communities.
A bedroom, office or small refresh
Focus on the room’s use, surface condition and light. Decide whether to include the ceiling, door and trim, and check how the new finish meets the hallway or adjoining space.
A living room, hallway or open-plan area
View colors beside the kitchen, flooring and other finishes that will stay. Agree on where the work stops and how people will move through the connected spaces during painting.
A coordinated update throughout the home
Plan the palette across rooms and list the included walls, ceilings, doors, trim and repairs. Discuss whether the home will be empty or occupied, which spaces need to remain available and how the work will be sequenced. If you prefer phases, agree on clear boundaries and priorities.
These are planning examples, not descriptions of completed projects. You can begin with a small update or a full interior repaint; the scope is worked out after looking at the space and listening to your priorities.
05 / COLORS AND LIGHT
How do you choose interior paint colors that work in your home?
Test a short list in the actual room beside the flooring, counters and trim that will remain. Compare it in daylight and under your evening lighting. A color you like on its own may feel different beside a warm floor or cool countertop.
For one room, check the view through its doorway. For a living area, compare adjoining spaces together. For a whole-house repaint, choose a coordinated wall, ceiling and trim palette, then test it in rooms with different light; coordination does not require every room to use the same color.
- Begin with what stays. Identify the undertones in tile, wood floors, stone, counters and existing cabinetry. Bring these into the color conversation first.
- Reduce the shortlist. Compare a few candidates rather than covering the wall with many similar options. Use substantial samples following the sample product’s instructions.
- Check the evening version. Your home should feel right after sunset too. Evaluate colors with the bulbs and fixtures you plan to keep.
- Approve the complete combination. Record wall color, ceiling color, trim color, sheen and product. Names alone can lead to mix-ups.
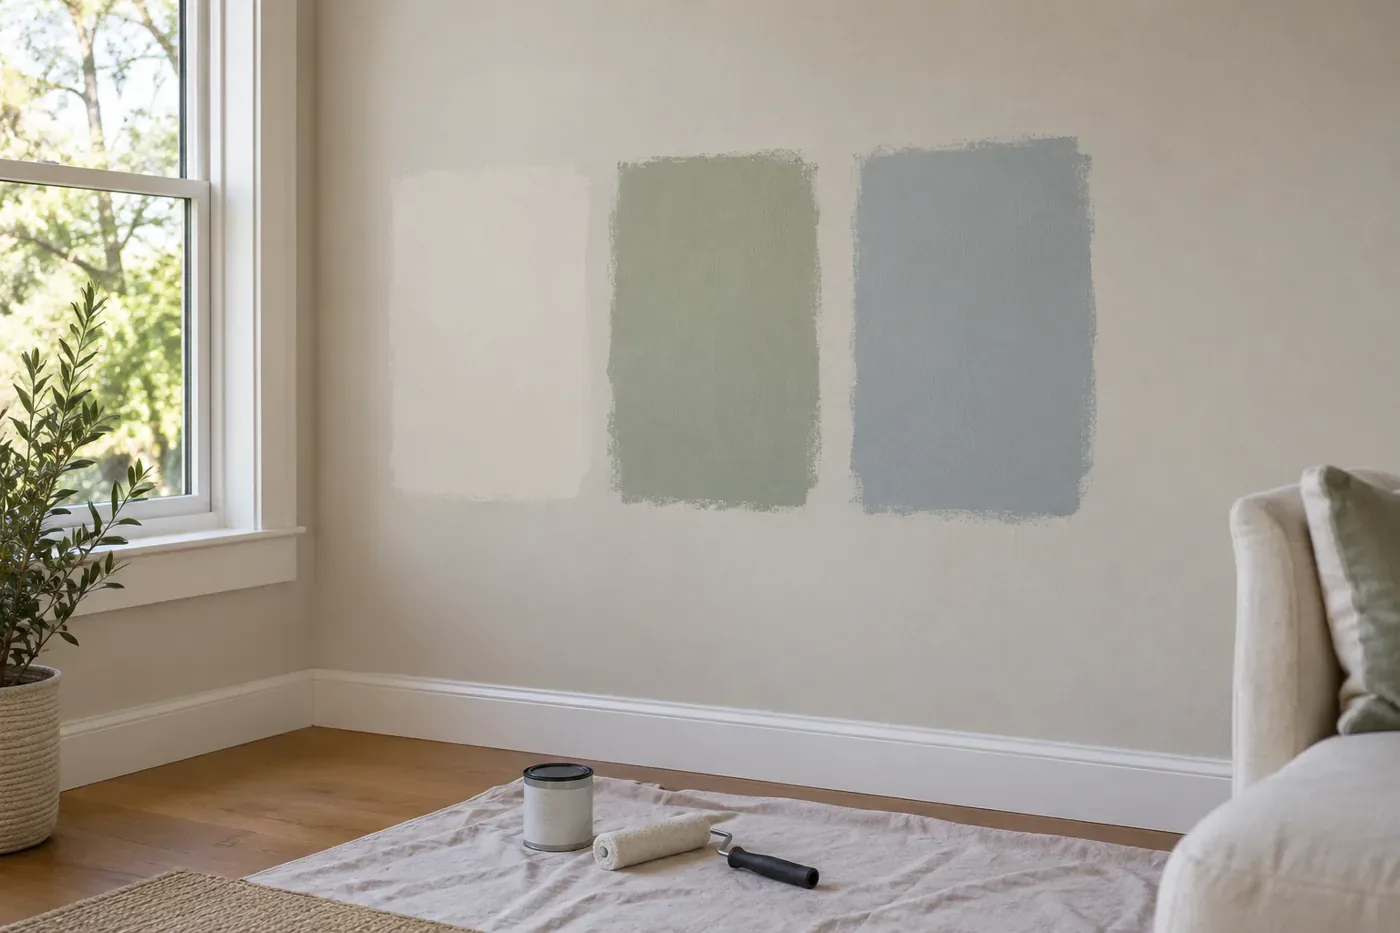
Three directions for your palette.
These are illustrative starting points. Compare paint on the existing wall under your home’s daylight and evening lights before choosing.
Warm neutral
A light, warm direction to compare beside your floors, trim and fixed finishes.
Soft sage
A muted green direction to consider across adjoining rooms and changing light.
Quiet blue
A cool, soft direction to test beside existing materials and warmer lighting.
06 / CHOOSE A FINISH
Which paint finish works best in each room?
Choose sheen by the surface, the lighting and the amount of cleaning it will need. Lower-sheen finishes soften reflected light; higher-sheen finishes draw more attention to both detail and imperfections. Product performance matters as much as the sheen name.
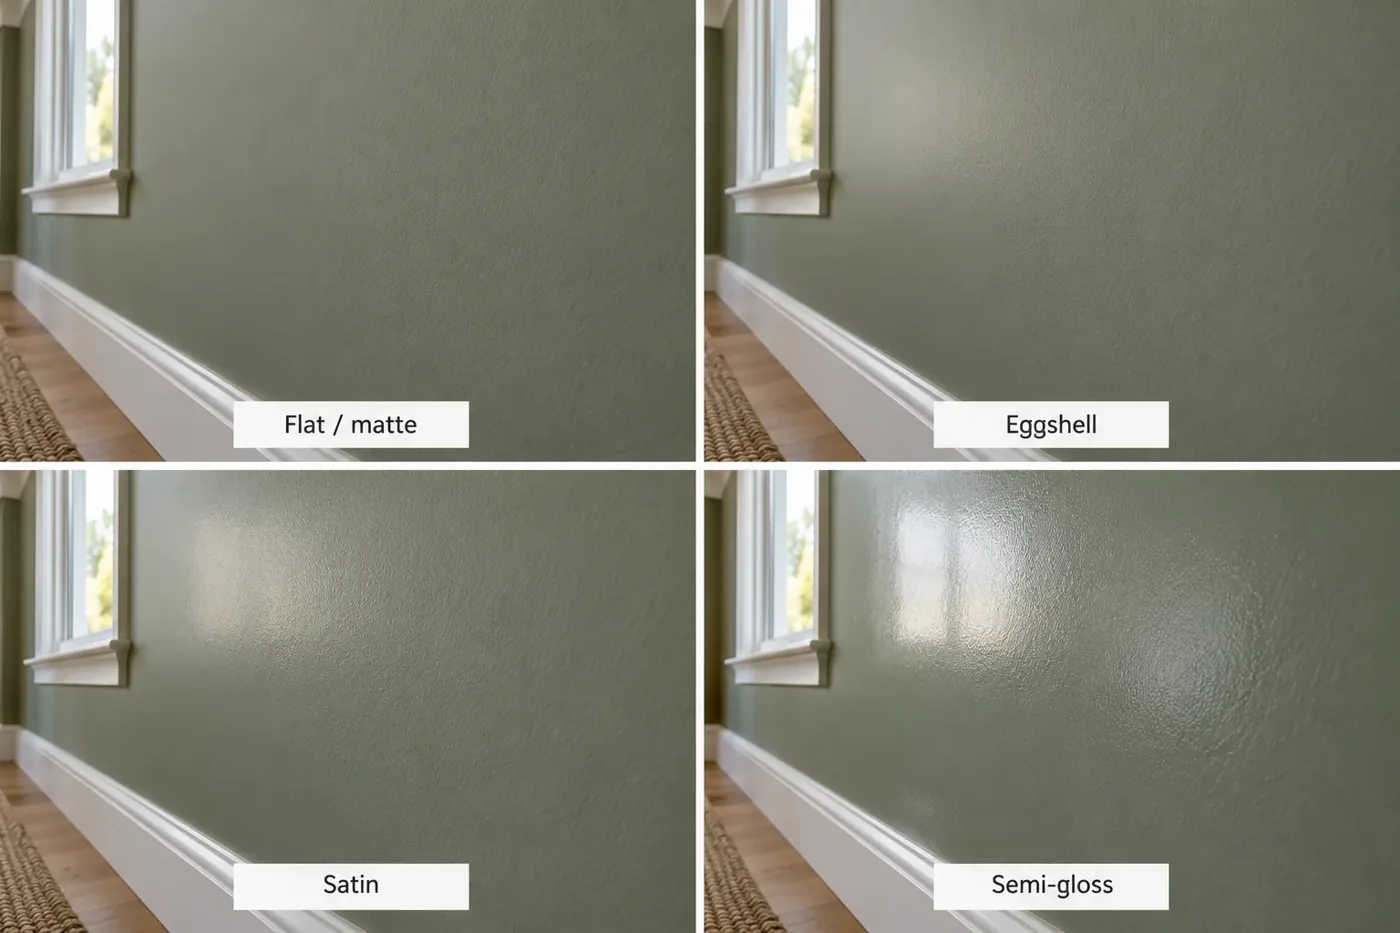
Flat / matte
A quiet look for ceilings and low-glare spaces. Check the product’s washability before choosing it for walls that need frequent cleaning.
Eggshell
A starting point for living rooms and bedrooms when you want a soft appearance with some reflected light.
Satin
Worth discussing for busy hallways and frequently handled areas. View a sample where light crosses the wall.
Semi-gloss
Often considered for doors and trim. More visible reflection makes surface preparation especially noticeable.
What about gloss or high-gloss paint?
Gloss finishes create a stronger, more defined reflection. They can be considered for selected doors, trim or decorative details when that is the look you want. Discuss the exact product and surface preparation; the sheen name alone does not establish suitability for a surface.
What about kitchens and bathrooms?
Ask for a coating suited to the room’s conditions and agree on when the space can return to normal use. Paint cannot resolve an active leak or a ventilation problem. If a bathroom wall is damp or peeling, identify the cause before selecting a new finish.
07 / ROOM-BY-ROOM GUIDE
How should you plan paint for different rooms and surfaces?
Think about each room’s use, light and existing condition, then choose the product and finish together. A house can have one coordinated palette while using different coating systems where the surfaces need them.
| Space or surface | What matters most | A useful detail to discuss |
|---|---|---|
| Living rooms and bedrooms | Color, reflected light and the desired appearance. | How the wall looks beside flooring, trim and evening lighting. |
| Hallways and family spaces | Frequent contact and cleaning needs. | The selected product’s washability, not just its sheen name. |
| Kitchens and bathrooms | Room conditions, cleaning and ventilation. | Existing grease, dampness or peeling, and return-to-use instructions. |
| Ceilings | Overhead light, stains and existing texture. | Whether ceilings are included and whether any stain needs diagnosis. |
| Doors and trim | Handling, existing finish and detail work. | The appropriate coating and preparation for adhesion. |
| Cabinets and built-ins | Material, existing coating and frequent use. | A separate preparation and finish scope rather than an assumed wall-painting add-on. |
08 / SURFACE PREPARATION
What preparation makes an interior paint job last?
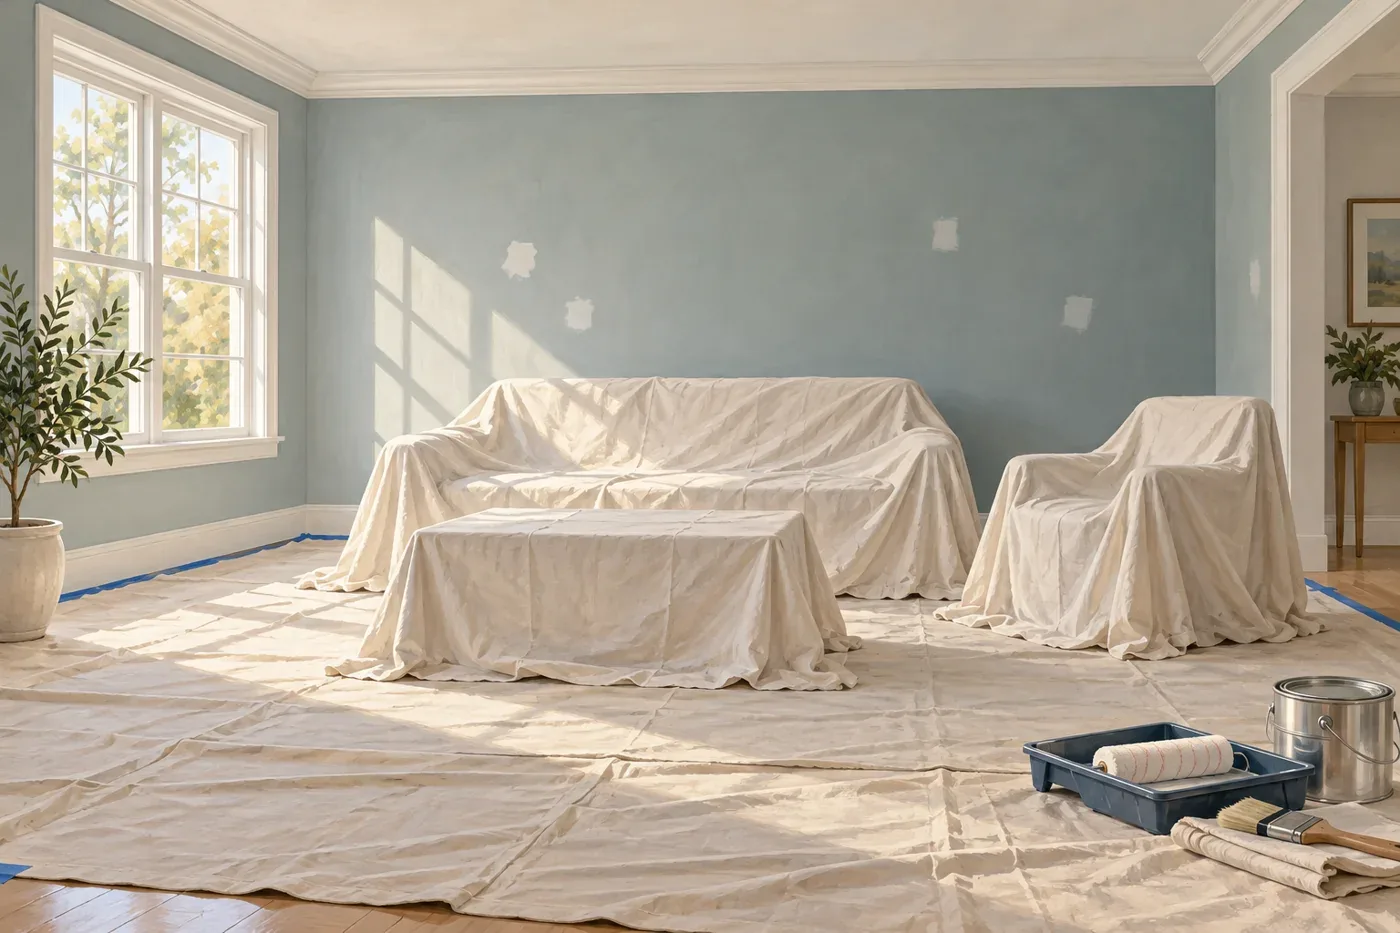
Preparation creates a clean, sound surface for the new finish. Depending on the existing coating, it may include cleaning, patching, texture blending, sanding, caulking and primer.
What needs attention before painting?
Point out recurring cracks, peeling or water stains during the visit. Their cause may need to be addressed before repainting. For textured walls, discuss how repairs will blend with the surrounding surface.
Does every wall need primer?
Not always. Bare drywall, porous patches, stains or adhesion concerns may call for primer; sound previously painted walls may need a different approach. The selected product and surface condition guide the system.
COLOR MATCH IS ONLY PART OF THE REPAIR
Why can a patch still show after painting?
A smooth patch on a textured wall
Matching the color alone may leave a repair visible because the texture reflects light differently.
Review the surrounding finish
Discuss texture blending, porosity and the expected appearance under normal room lighting.
Illustrative surface study. Repairs may improve the appearance without becoming invisible under every light or viewing angle.
09 / THE PAINTING PROCESS
How is a professional interior painting project carried out?
A professional interior repaint moves through assessment, protection and preparation, finish application, then a walkthrough. The exact work follows your home’s condition and the written scope.
- Assess and agree. Review the rooms, repairs, colors, products and timing during the estimate and project planning.
- Protect and prepare. Protect floors and nearby belongings, then complete the agreed cleaning, repairs and surface preparation.
- Prime and paint. Prime where needed and apply the selected finish following its coverage and drying requirements.
- Walk through and care. Review the details together and confirm when to use and clean the new finish.
Brushes, rollers and spraying each have a place. The right method depends on the surface, surroundings and coating; the method alone does not determine quality.
CR Painting’s interior painting service follows that same practical starting point: assess the home in person, then agree on the surfaces and preparation before the work begins.
10 / DIY OR PROFESSIONAL?
Should you paint the interior yourself or hire a professional?
A small, accessible room with sound surfaces may suit a homeowner with the time and confidence to do the work. High ceilings, detailed trim, extensive repairs or a larger occupied-home project can make professional help more useful.
Consider preparation, protection, materials, drying and cleanup as well as the painting itself. For an older home, address possible lead paint before disturbing an existing coating.
When comparing contractors, look for a clear written scope, suitable products, agreed preparation and current license and insurance information. Discuss how changes and the final walkthrough will be handled.
11 / WALKTHROUGH AND CARE
What should you check during the final walkthrough?
Review the agreed surfaces with your painter under normal room lighting. Check coverage, edges, repaired areas and cleanup, and discuss any remaining items together.
Keep a simple paint record
Save the brand, product line, color code, sheen and room for each finish. Keep leftover paint only as directed on its label. Touch-ups can still look different because of aging, texture or application.
Care for the new finish
Wait for the recommended cure period before cleaning, then use the gentlest method permitted by the product instructions. If peeling or staining returns, investigate the cause instead of repeatedly covering it.
12 / COMMON QUESTIONS
Questions you may have before getting started.
Do I need colors or measurements before requesting an estimate?
No. Contact CR Painting to coordinate a convenient time for a free on-site visit. We look at the spaces and listen to what you would like, then prepare the estimate. You can still be exploring colors or deciding which rooms to include.
Should I choose the wall color or the trim color first?
Start with the finishes that will remain. If the existing trim, cabinets and flooring are staying, compare wall samples against them. If everything is changing, approve the wall, ceiling and trim combination together.
Can a paint sample look different once the whole room is painted?
Yes. The size of the painted area, reflected light, nearby materials and sheen can change how you perceive it. Compare substantial samples in several positions and at different times of day.
Do small wall repairs always disappear under new paint?
Not always. Differences in texture, porosity and reflected light can make a patch visible. Discuss the expected repair finish before painting, especially where strong side lighting crosses the wall.
Do I need to move all my furniture?
Before painting begins, agree on what will be moved, who will move it and how belongings will be protected. Heavy or fragile pieces may need special arrangements. You do not have to empty the home simply to discuss the project.
Can I paint one room, several spaces or the whole interior?
Yes. The scope can range from a bedroom or living room to connected areas or the whole interior. Identify the surfaces you want included and how the work meets any areas staying unchanged. A larger repaint can also be discussed in phases, with the sequence and boundaries agreed in advance.
KEEP EXPLORING THIS GUIDE
Go back to the decision that matters to you.
CONTINUE EXPLORING
Helpful reading for your next decision.
INTERIOR PAINTING ARTICLE
The benefits of hiring a professional interior painter
A closer look at professional help for your home’s interior.
PLANNING AN OUTDOOR PROJECT?
Our guide to exterior home painting in California
Explore the different decisions involved in painting outside.
Looking for painting information near you?
For information about services in your area, explore the location pages below.
About this guide
Prepared by CR Painting for homeowners in Tracy and nearby Central Valley and East Bay communities. Illustrations and color studies explain planning concepts; they are not project photographs, measured lighting simulations or product recommendations. Your surfaces and the selected product instructions guide the work.
YOUR NEXT CHAPTER
Would an in-person assessment help?
If you would like help applying these ideas to your home, contact CR Painting. We will coordinate a convenient time for a free on-site visit, look at the spaces and listen to what you want before preparing the estimate.
